
Article by Sam Winebaum and Dominique Winebaum

Dominique and I recently completed a 200 miles (320 km) trek in 13 days - across Switzerland on the Via Jacobi/Jakobsweg or as it is known in English the pilgrimage route of St. James of Compostela which goes from Northern Europe to Spain.
During the trek, we tested gear from Mammut (a Swiss brand), Hoka One One, REI, Smartwool, Salomon, Ultimate Direction Polar, Coros, and Oofos.

As we put to the test different types of gear through varying weather and terrain conditions over a two-week period, this article combines gear reviews meshed with sights from our trip and some background information about the Via Jacobi. Our gear reviews are the core of this article (but look at pictures). Trip beta is at the end. Please feel free to comment if you have any questions!

We started in early May in Rorschach, Lake Constance, which is in the canton of St-Gall, and finished in Romont in the canton of Fribourg. Our hiking journey was also a personal pilgrimage of sorts as we ended in Romont, where we met through a running club (CARC) in the early 1980s when we were both worked in the region.
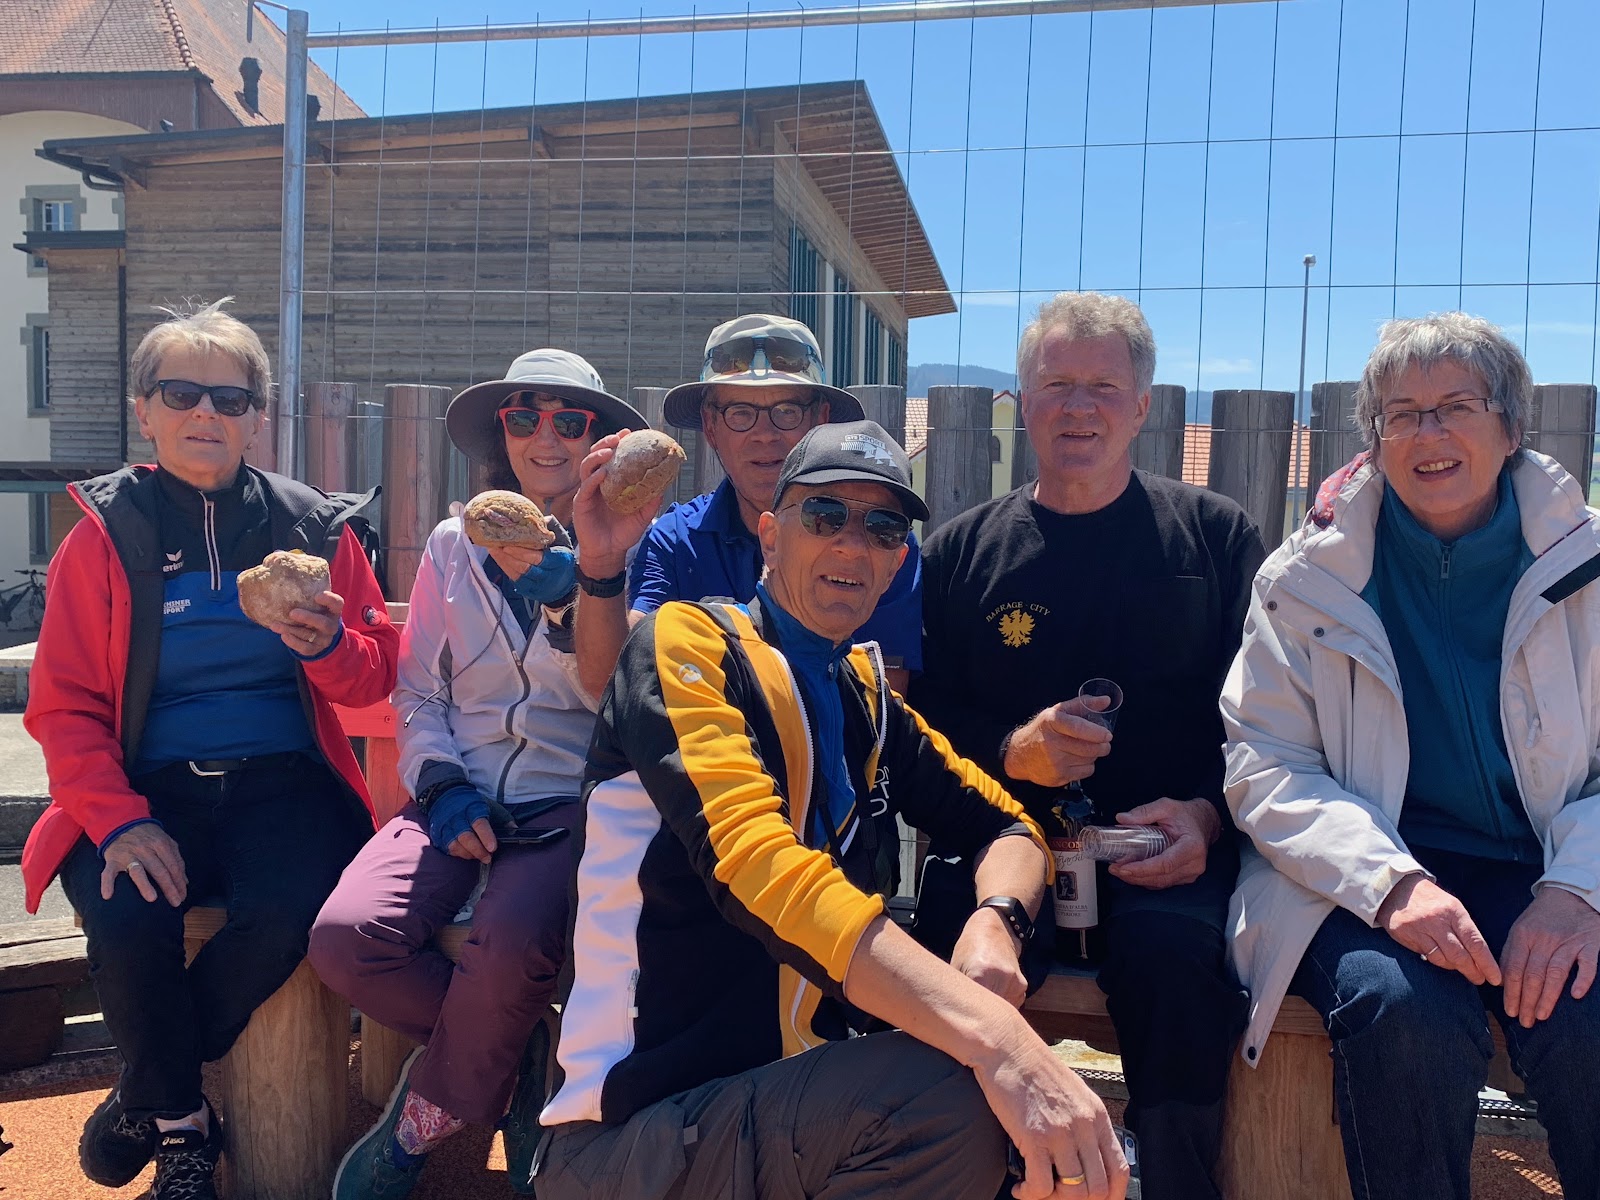
Our friends from the CARC joined us for our last leg of the trip, Fribourg - Romont, which completed our hiking journey in a symbolic way and which was filled with retrouvailles.
 |
| Photo by Jacques Baudois taken at the end of our trek with a view of Romont in the background. |

The Via Jacobi/Jakobsweg is part of the Camino de Santiago/ The Way of St. James/Le chemin de St-Jacques de Compostelle, which is a network of ancient pilgrim routes across Europe leading to the tomb of St-James in Santiago de Compostela in north-west Spain.

We did encounter some brief sections of (painful) ancient cobbles here near Fribourg but largely the path was gravel, grassy meadows, some brief rocky sections and quite a bi of pavement.

A blue, yellow, and white scallop shell is the symbol of the Via Jacobi here shown at a log book site built into a cliff on the climb to Bruningpass and with an actual scallop shell on the sign below

A blue, yellow, and white scallop shell is the symbol of the Via Jacobi here shown at a log book site built into a cliff on the climb to Bruningpass and with an actual scallop shell on the sign below
The Via Jacobi/Jakobsweg, goes from Lake Constance to Geneva (280 miles) and is called Swiss National Route 4. For mapping and navigation see the end of the article. We used the Switzerland Mobility free app with its detailed topo maps and precisely mapped route (GPX files downloadable).

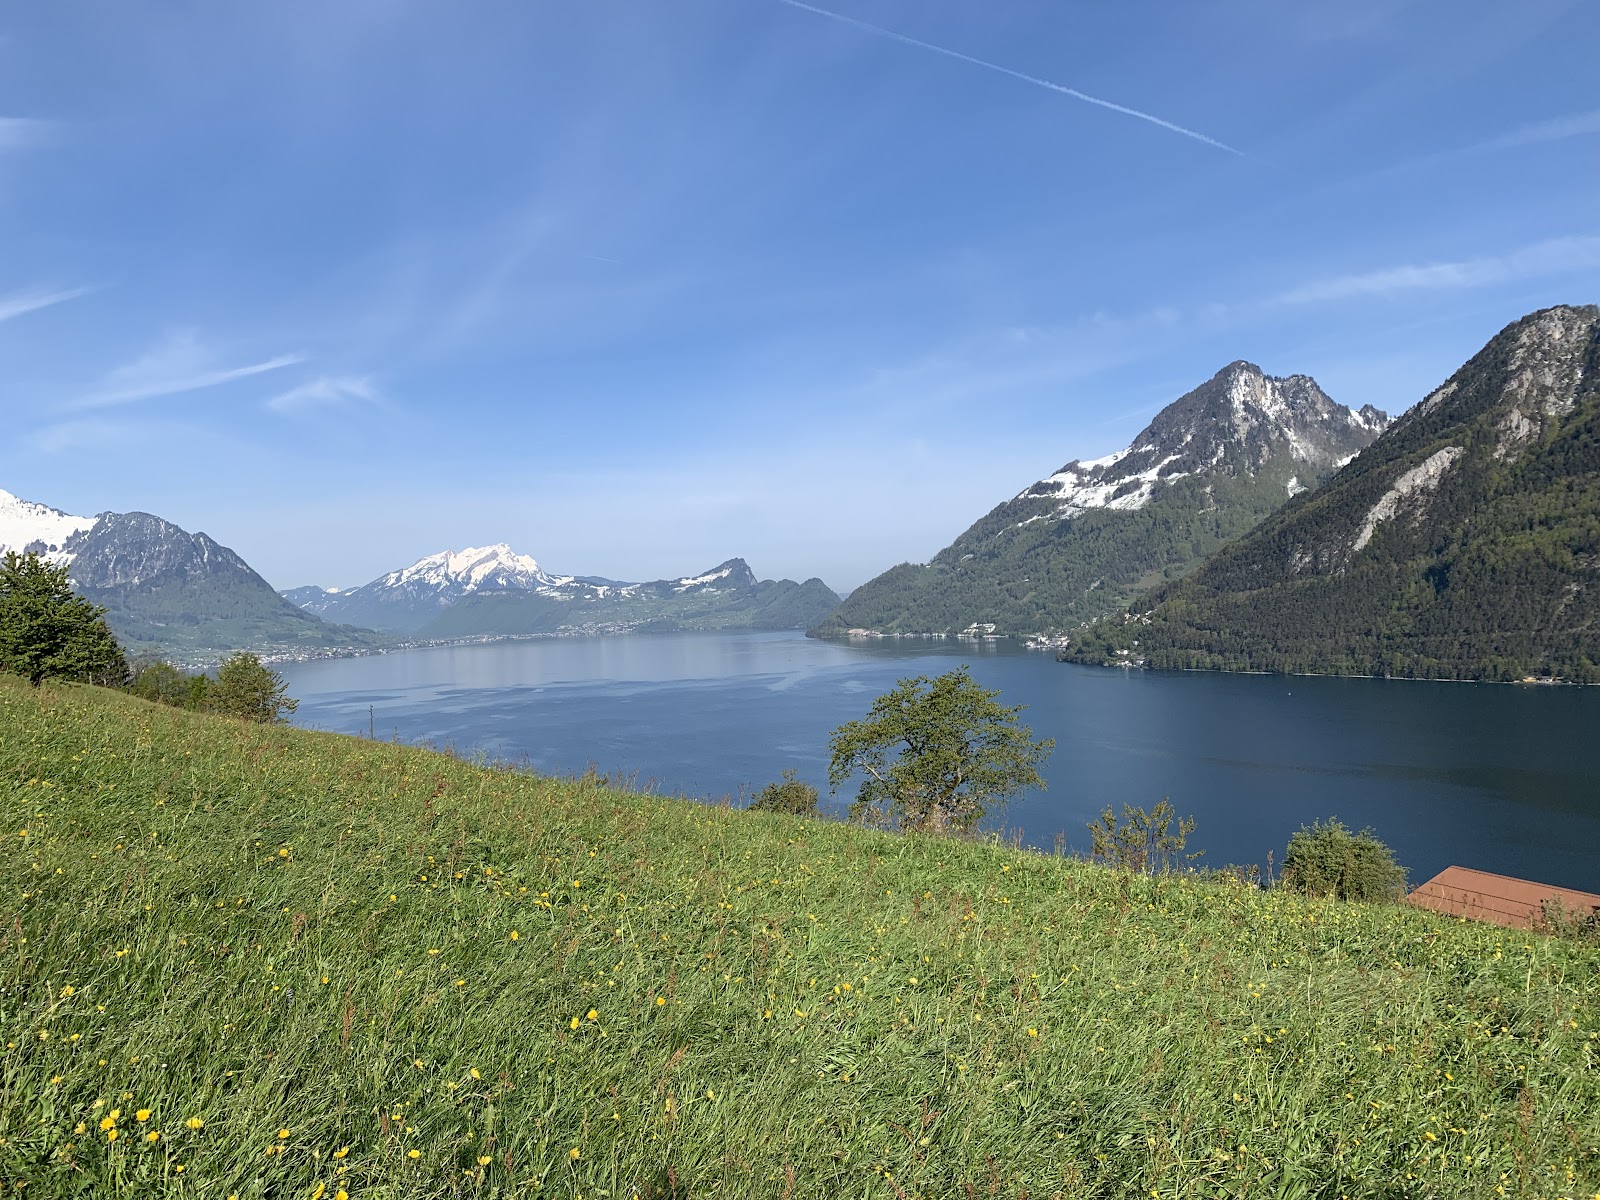
The Via Jacobi offers a wonderful hiking experience across hilly and green landscapes with mountain views where cows, sheep and goats graze in pastures, along and across lakes, and via a trail punctuated by churches, monasteries, cloisters, and chapels.
 An extensive photo album of our trek is HERE
There are a number of optional routes on the Via Jacobi/Jakobsweg. We opted for Swiss National Hiking Route 4 ending in Romont instead of going all the way to Geneva as we had to head back to New Hampshire.
We started in Rorschach after spending the night in a Youth Hostel with a view of Lake Constance, which turned out to be the warmest weather of the trip; in the upper 60’s by afternoon. Dominique was hoping to go for a swim in Rorschach bringing along a bathing suit, Darn, the swimming pool was not open ye The municipal pool is part of the Youth Hostel complex.
As we found out, we walked daily on quite a bit of pavement, including narrow country farm roads and sidewalks as we approached villages and towns along the course.

Our first stop was in St-Gall, where we visited the impressive Abbey of St Gall but wished we had devoted more time (an afternoon) to visit the the Abbey library and other sites. We enjoyed a delicious lunch - amazing beet soups - at the Cafe g’nuss and could not resist sampling its renowned fine patisserie http://www.gnuss.info/

Our first stop was in St-Gall, where we visited the impressive Abbey of St Gall but wished we had devoted more time (an afternoon) to visit the the Abbey library and other sites. We enjoyed a delicious lunch - amazing beet soups - at the Cafe g’nuss and could not resist sampling its renowned fine patisserie http://www.gnuss.info/
We walked through the old city and neighborhoods of St Gall before hiking back into the countryside that led us to Herisau.

The Via Jacobi Route 4 seems to follow the original pilgrimage route quite closely between towns, but it wanders down quieter lanes and through meadows where more major roads have replaced it.

All the trails are well maintained and well marked with yellow diamonds. As we hiked through many cantons (states), we would notice the different armory/colors on the yellow diamonds representing the canton we were in. Each junction with another trail is marked with an additional Route 4 sign to avoid any confusion.

There are dozens of other major and minor routes/trails following or crossing Route 4. Major intersections and towns have signs indicating the name of the location and altitude as well as additional signs with walking time to various destinations. Until we reached Fribourg/Freiburg on Day 12, the language spoken was Swiss German or Schwyzerdütsch, which proved to be a bit of a challenge for us but we often got by in English, French, and even Italian. We had no issues reading the signs indicating destinations in German but struggled a bit with the pronunciation. As a rule, we were generally a bit faster than “sign time” despite our quite heavy packs -- time to talk packs!
Mammut Trio Spine and Trea Spine Backpacks ($300)


Mammut, a Swiss mountaineering brand, founded in 1862, outfitted us with apparel (more on that later) and their top of the line Trion Spine (men’s) and Trea Spine (women specific fit) 35 L (liters) mountaineering/hiking packs. The capacity was just right for the trek. A bit overbuilt for fast walking, and quite heavy at 2.1 kg / 4.6 lbs, they are made of burly nylon built with all essential mountaineering attachments to carry an ice axe, trekking poles, rock climbing gear(on a stiff loop on the waist belt), ropes, and more. Day after day, they remained extremely comfortable -- our packs weighing approximately 10.5 kg or 22 pounds. We both carried electronic devices in addition to our smart phone storing them (laptop/ipad) in the stretch pocket, which would normally hold a hydration bladder. There is of course a port for a hose. For the official features of the packs,visit the link to Mammut here

We were amazed by the comfort of our packs despite carrying heavy loads. Throughout our trek, we had zero issues with sore backs and hips, and experienced only slight discomfort from our shoulders, mostly at the end of the day. We almost never noticed the packs despite the loads. Featuring a patent pending “Active Spine Technology” with an integrated height adjustment system via a pull out tab that can be lifted and then snapped into place, the packs provide flexibility to adjust and thus comfort.
 At 5’10’’, Sam adjusted the height to large at a very unpleasant first day on medium and Dominique who is 5’ 6” tall set hers to medium,. The dual-layer dense foam padding on the shoulder straps and waist/hip belt added noticeable very stable comfort and there was never any swaying or motion beyond the direction of travel.


The “Active Spine Technology” is a system that allows for both the shoulders and hips to move freely as both the waist belt and shoulders have separate pivots points while the pack remains snug and stable. More information about the “Active Spine Technology” can be viewed in the video:
And at our "scenic" video review of the Trion/Trea and Masao Light Hard Shell below
Another distinctive feature of the pack is the large front opening that allows you to access the contents of your pack via a zipper system around the circumference of the front of the pack, namely the backpack opens like a suitcase.
For additional easy access, gear can be stored in the large internal zip pocket in the front opening and in the deep zip top pocket.
For additional easy access, gear can be stored in the large internal zip pocket in the front opening and in the deep zip top pocket.

The Trion Spine (men’s left above) has a zip pocket with internal mesh pocket on one of the shoulder straps, which could hold Sam’s iPhone Xs in case. However it was difficult to retrieve it from the tight pocket. The Trea with narrower shoulder straps to better fit the female anatomy has no shoulder pocket. Both the Trion spine and the Trea spine have a belt pocket; the pocket is slightly larger on the Trea Spine. Dominique used the pocket to store two small tubes of sunscreen and it was big enough to hold her phone, however, she opted to store it in the front pocket of her shirt or at times, in the side pocket of her Mammut Runbold hiking pants when walking on flat or slightly hilly terrain. Sam did the same. For the purpose of our trek, Sam felt the size of the shoulder pocket and the belt pocket were too small. To handle water, we snapped an exterior side pocket: the Outdoor Research for Dominique was a good and secure choice as opposed to Sam’s Nite Ize “cup holder” as a few bottles were lost along the way slipping through the straps. We both opted for a broad Evian sport bottle purchased at a convenience store that we would keep refilling. While designed for serious mountaineering stretch side pockets would be welcome on these packs
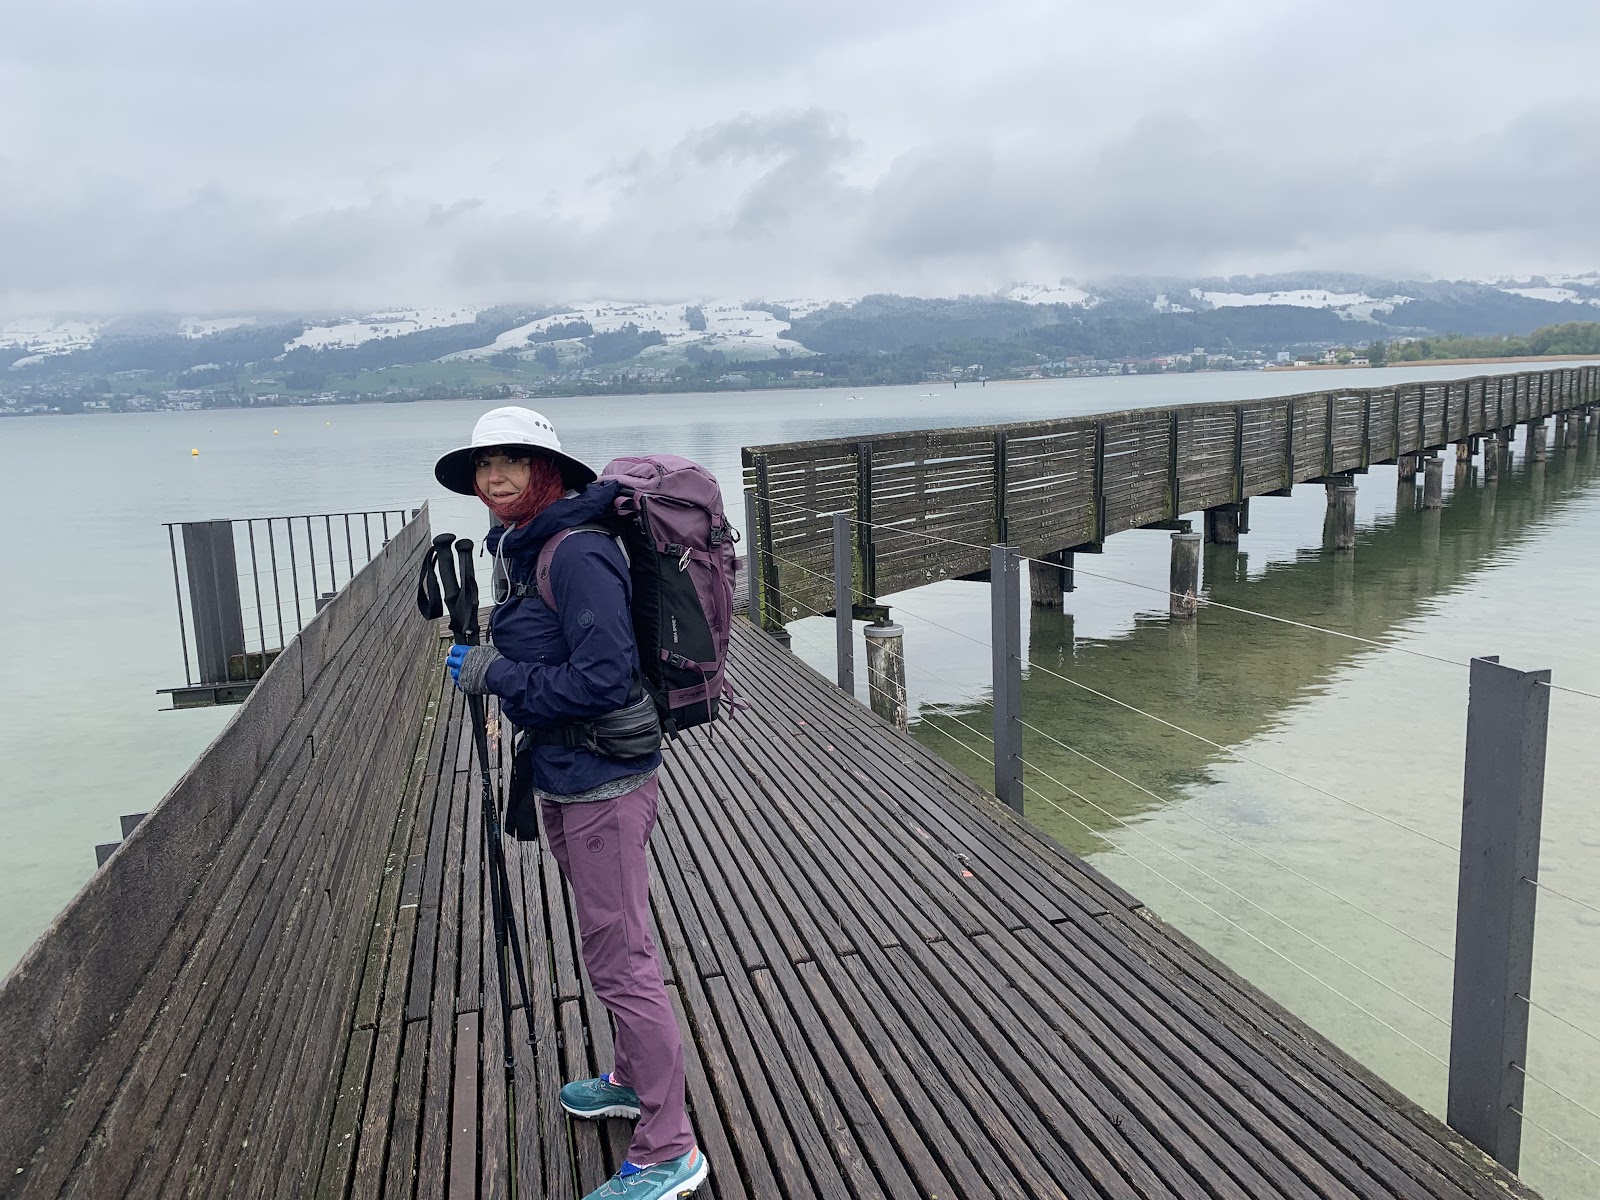
The Trion and Trea backpacks are waterproof, which provided us with piece of mind as we walked in the rain -- our gear stayed dried inside the pack without the use of an unsightly rain cover. There are two choices for color for each pack: Black/White or Surf/Black for the Trion and Galaxy/Black or White/Black for the Trea. Dominique received several compliments on the matching color of her backpack (Galaxy/Black) and hiking pants -- the Mammut Runbold in Galaxy.
Top of the line backpacks, the Mammut Trion and Trea Spine are a worthwhile investment. Even though we did not use the mountaineering features of the pack, we valued all the comfort, ease of access to gear, compact and attractive design, bomb proof durability, as well as waterproof qualities that the pack provided us during our trek.
Footwear

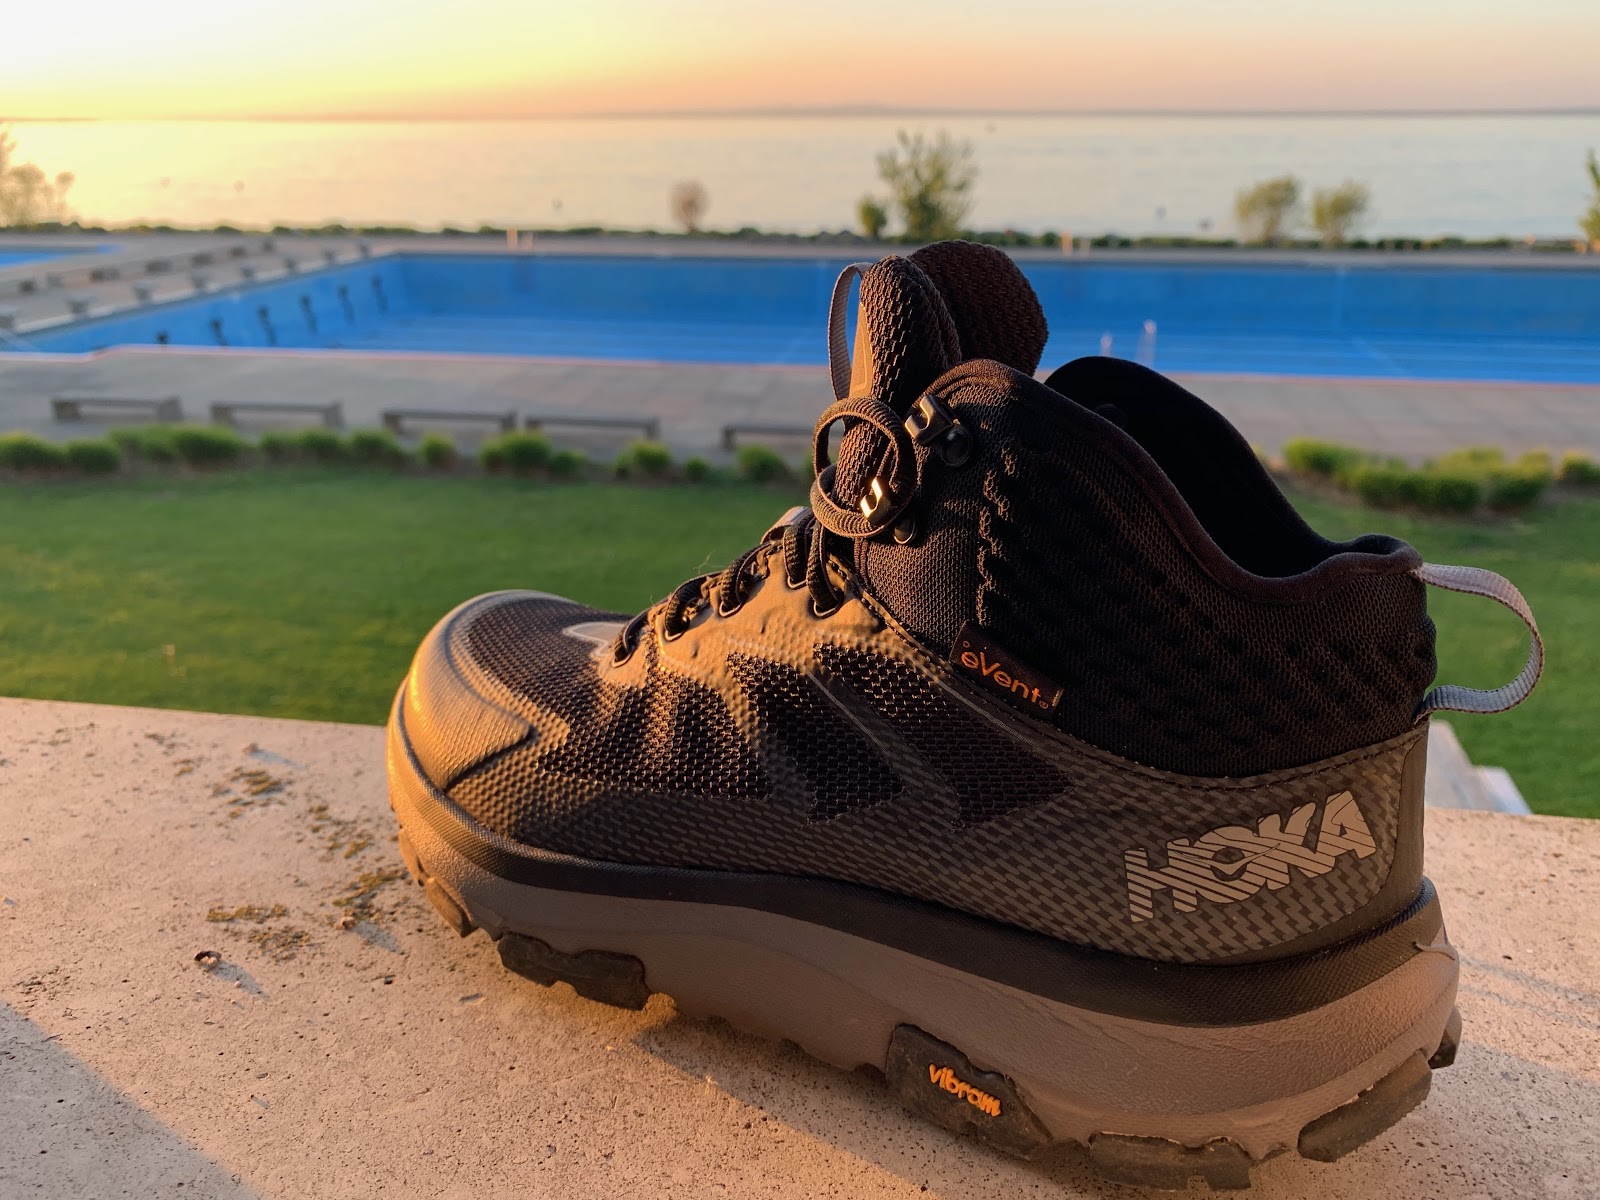
Hoka One One outfitted us with their brand new Sky Toa mid-height hiking boots ($170). These boots are light, not much heavier than a trail runner coming in at 395 g for Sam’s men’s size 8, he sized down half a size and 400 g for Dominique’s women’s size 9, her usual size in running shoe.

Similar in design to the excellent Speedgoat Mid WP (RTR Review) the Toa is a slightly beefier variant with a stiffer rear collar. It has a waterproof breathable eVent upper, which proved essential for the day we hiked in deep snow and often miles of wet meadows. Our socks were never soaked and the membrane did an excellent job of temperature regulating in moderate temperatures. As temps approached went into the 60’s they did get a bit warm but we wouldn’t have traded the waterproofing given the mixed conditions.

Dominique had zero blisters while Sam had one blister on his heel for a few days, possibly as a result of slipping in the upper when wet. After a long day hike, it is key to dry out your hiking boots -- removing the inner soles and stuffing them with newspapers helped.
Sizing is large and commodious. Sam sized down half a size as he planned to wear light Salomon Outpath Mid hiking socks, which in a running sock would a medium thickness sock, so thin for a hiking sock. Dominique was at her true to size and wore both medium and heavy weight Drymax hiking socks and felt that her Toa were still a bit roomy at her usual size 9. Sam did find when brand new the toe box height to be low but after 3 hours on trail things packed and stretched. Moderate to higher volume feet should do fine in this upper after the short break in. If you plan to wear lighter socks or have narrow low volume feet, sizing down a half size at least is pretty much a must.
The midsole is softer than a typical hiking boot and is close to the soft and bouncy feel of the Speedgoat trail runner and this was particularly appreciated on the many pavement sections. Stability was outstanding for such a light “boot” on all surfaces although one must say we had few rocky technical sections. Since our trek, Dominique took her Toa on the notorious rocky trails of New Hampshire’s White Mountains and although she had a light pack this time they performed just fine.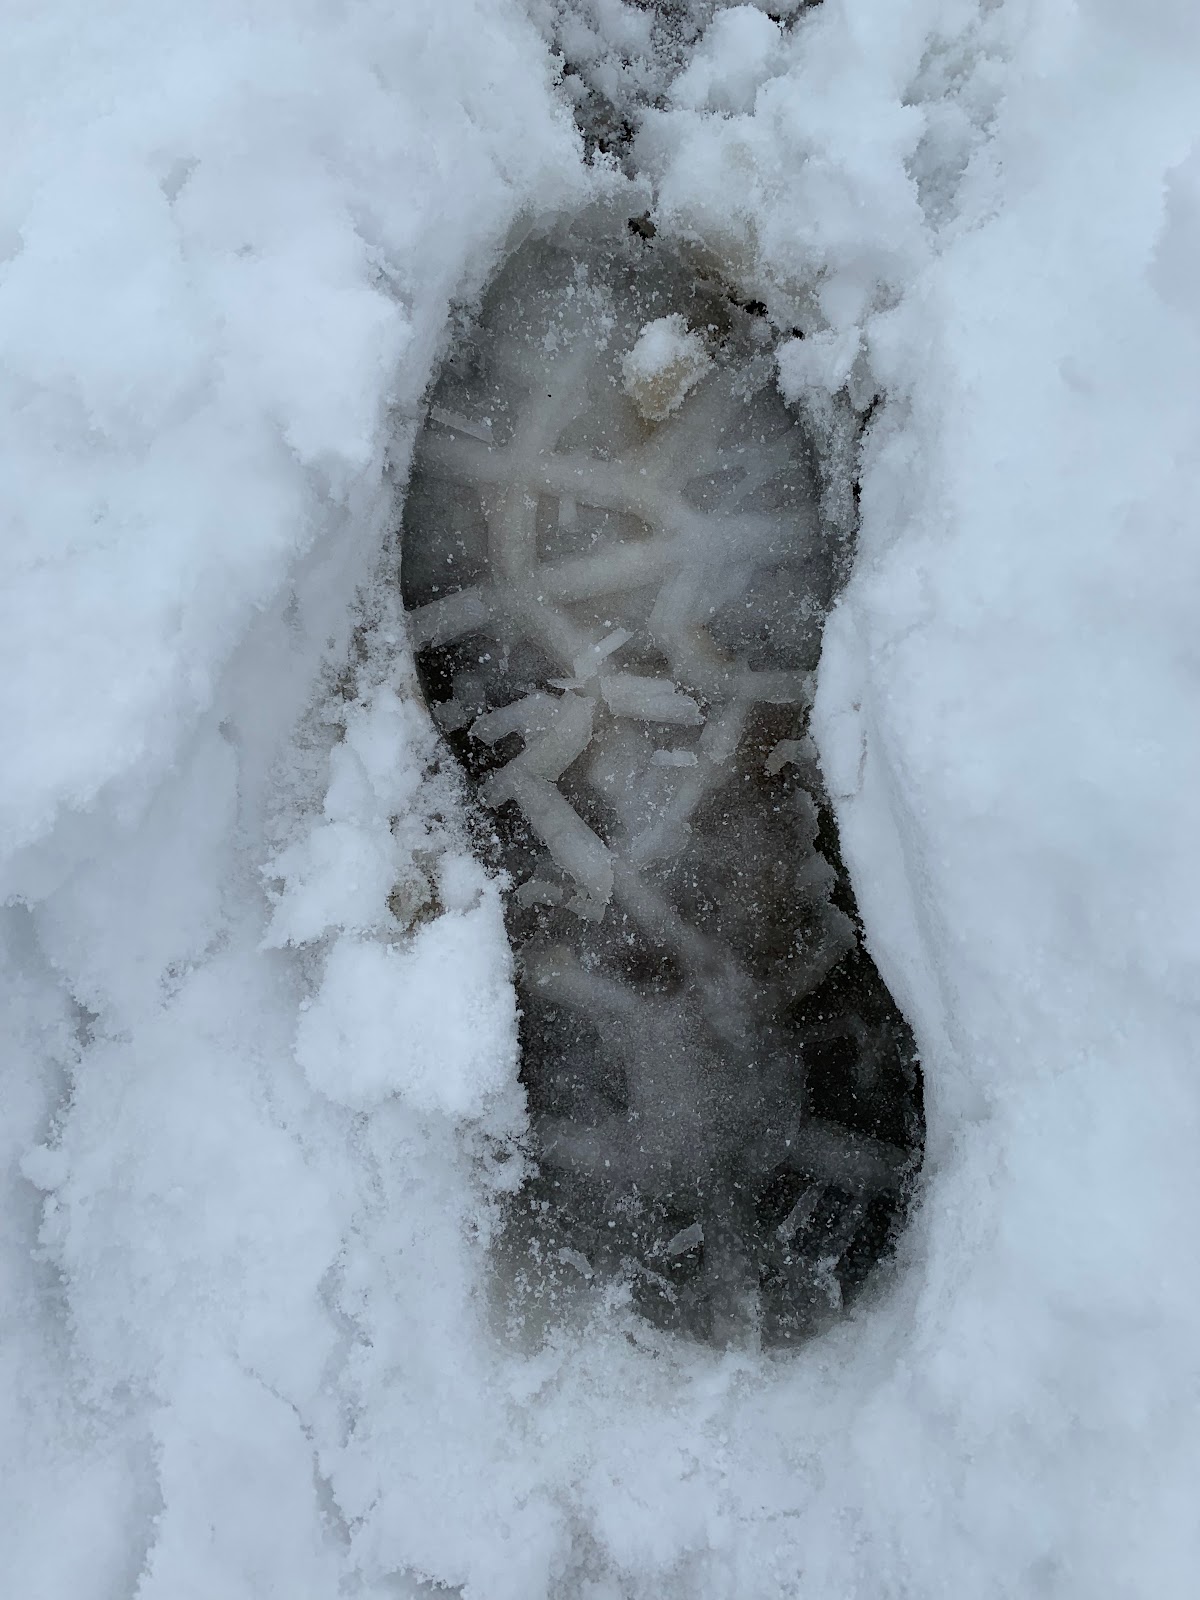
The grip from the Vibram MegaGrip outsole was outstanding on all surfaces from snow to wet grass, to steep paths. After 200 miles, including many miles of pavement, neither of us have any outsole wear to speak of.
 |
| 200 miles none the worse for wear |
If the upper holds up, this outsole should easily get more than 500 miles of wear if not more.
In comparison to Dominique, Sam felt that the laces would stretch and he would frequently tighten them, especially given the already voluminous fit. Clearly, it may be that Dominique did a better job tightening her shoelaces when putting on her hiking boots -- see picture below.

We both observed unsightly “fuzzing” of the outer mesh after the first few days in the area of the very nice (for a hiking boot) forward flex point.

Over time, the fuzzing expanded a bit, which concerned us mostly from an appearance standpoint. Sam also experienced a very small delamination of the overlay in the same area. It appeared on the second day didn’t worsen over time. It seems the boot may be almost too flexible for its upper.

Sam also lugged along a pair of the new Salomon Sense Ride 2 trail runner, really an excellent road trail hybrid. He wore them for two days of flatter terrain where we hiked our longest daily mileages of 30 and 36 km. He appreciated the superb cushion and overall comfort, better yet than the Toa on pavement and hard trail, but given the heavy pack (20lbs), lateral stability was not quite what the Toa provided. A dream shoe would be the Sense Ride in a mid height.
For après hike activities, which consisted mostly of wandering around town in search of eating and drinking places, we both wore the OOFOS OOmg recovery shoes.

Soft and easy slip on, they became an essential companion after a long day hike. Lightweight and stylish, they were a much better option than flip-flop as we could wear them in all kinds of weather, even with socks for extra warmth. They were also extremely light to carry in our pack.
Trek Apparel
Smartwool Merino Sport Ultra Light Hoodie

Per Sam’s suggestion, I selected the Smartwool Merino Sport Ultra Light Hoodie for our trek and it became one of my favorite pieces of clothing to wear on the trail -- and off the trail too! An ultra-light jacket designed for running, it performed extremely well as a shell as we hiked in various weather conditions. Foremost, the jacket is highly breathable and is designed to keep you cool via gender specific body-mapped panels of Merino Sport 150 mesh pieced under the arms, in the upper back, and the hood.
 Core vents located front and back of shoulders as well in the back over the mesh fabric, provide extra-ventilation. The DWR (Durable Water Repellent) coating on the jacket protected me against the wind, drizzle, and chilly weather that we encountered. I wore the slightly heavier fully waterproff breathable Mammut Masao Light jacket on rainy and snowy days, however, kept my Smartwool Merino Sport for comfort and extra warmth.

As we hiked from Einsiedeln to Schwyz over the Haggenegg pass (4626’) the ground was covered with a heavy coating of fresh snow, I wore my Smartwool Merino hoodie with a Merino Buff around my neck enjoying the surroundings in the comfort of my shell.
In addition, the Merino panels on the UL Hoodie improve freedom of movement and are odor resistant; my jacket remained fresh despite days of hiking. Reflective elements are integrated in the fabric for both the back and the hood to provide increased visibility in low light.

The weather was sunny but a bit chilly for our short boat crossing from Brunnen to Treib on Lake Lucerne - enjoying the ride and the vistas!

Weighing only 146 g/ 5.15 oz, the shell takes no room in the backpack and was lighter than my bathing suit, which I never got to wear! I store my phone/glasses in the chest pocket, which is also designed to pack the shell.
Stylish and versatile, the Smartwool Merino Sport Ultra Light Hoodie proved to be the perfect layer – ultra light, thermo-regulated, and highly breathable – for our hiking trip in weather that felt more like April than May. In retrospect, I should have brought a Smartwool Merino base layer on our trip to minimize washing and reduce the load in my backpack -- maximizing comfort with fewer clothing options!
Color: Deep Navy, White, and Amethyst. Size: true to size.

Sam wore the Smartwool Merino Sport 150 Tech T Shirt most days on its own or as a baselayer. It is a merino polyester blend and stayed remarkably fresh. I only had to wash it once. It is very light with bar tacked ventilation slots on the upper back and a more mesh like wool blend in high sweat areas. It handled a broad range of temperatures and was nicely stink proof! Amazingly there is no visible wear on the shoulders from the pack straps.
Mammut Masao Light Hooded Hard Shell

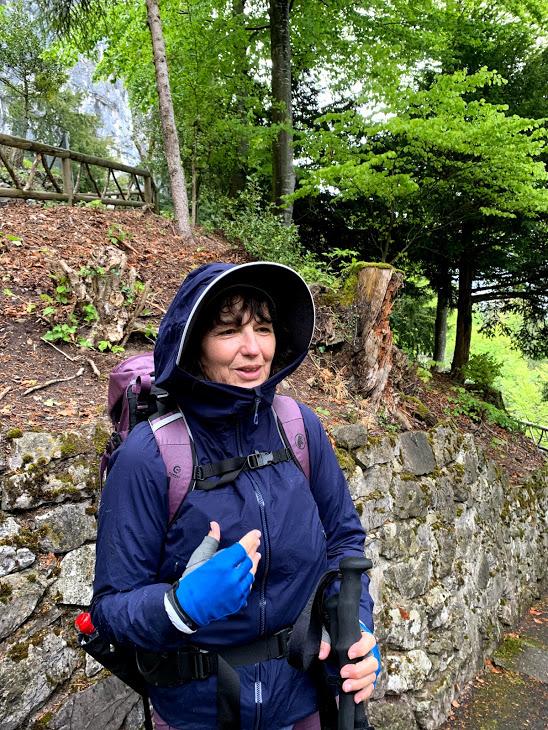
We both selected the Masao Light Hooded Hard Shell for an outer layer to protect us against the rain and cold during our trek. Hiking in early to mid- May in Switzerland, at fairly low-altitude for the most part, the Masao Light served us well on rainy, windy, and snowy days. Extremely comfortable, light, and waterproof - including the zippers - the jacket protected us against the unpleasant, and unexpected weather. The Masao Light is technically designed for climbing, as opposed to purely hiking. The climbing features include a helmet compatible hood and harness-compatible front pockets, which we found to be extremely practical for hiking. Super classy as well, we wore it after our days to dinner as well.

The pockets are roomy and easily accessible which we used to store our phone, glasses, and other items. Underarm zippers provide optimum ventilation when needed. We stayed dry and comfortable as we hiked through all kinds of weather -- rain and snow -- often wearing a single layer (of different thickness depending on the temperature) underneath our shells from about freezing into the 50's.
The women's model cuffs are slightly asymmetrical with a small flap on the outer and elastic on the inside; a design that worked well with our hiking gloves.
In all kinds of weather we wore an REI Sahara Hat (Dominique) and REI Bucket Hat (Sam) “sun” hat and were surprised how well the Masao hood would fit over our large brimmed hats.
When we met with Dominique’s brother, René, and his girlfriend, Elsa, for a short stage from Interlaken to Spiez, along and across Lake Thun, they both were impressed by our Masao Light shells (and all our nice Mammut equipment). Elsa wore a Mammut jacket, however, hers was heavier and shorter. She hiked in the Masao Light for a couple of hours until Dominique had to reclaim it due to the heavy rain; in short, she really liked the jacket and felt it would be perfect for her mushroom outings in the woods and hiking in the Alps. The jacket is a bit pricey at $300 but René was able to purchase one on sale during a Memorial Day Weekend sale (via Sam).

Sam -- I concur with everything Dominique has said about the Masao Light. I have tested many lightweight waterproof breathable run oriented jackets in the last few years and the Masao Light stands out for two reasons: it has the softest quietest “hand” or feel and it is the most fully featured given its 2 zip pockets, great hood, and especially its pit zips. Classy, light and stylish it stayed remarkably “fresh” and was also great post hike when we staggered off to dinner.

I have tested lighter jackets, however, the Masao Light packs down the smallest in a stow bag that comes with the jacket.

In terms of specs it is a 20K/24K jacket (Water column: 20,000 mm Vapor permeability: 24,300 g/m²/24h) which means it breathes very well and is waterproof. It exceeds the required standards for the UTMB ultra race in France. I found its comfort on the many chilly days on our trek outstanding. Even on our coldest day around freezing I only wore the Smartwool Merino Sport shirt underneath with early in the morning an additional very thin long sleeve merino shirt. I never overheated on climbs, using the pit zips never felt chilled in the wind.
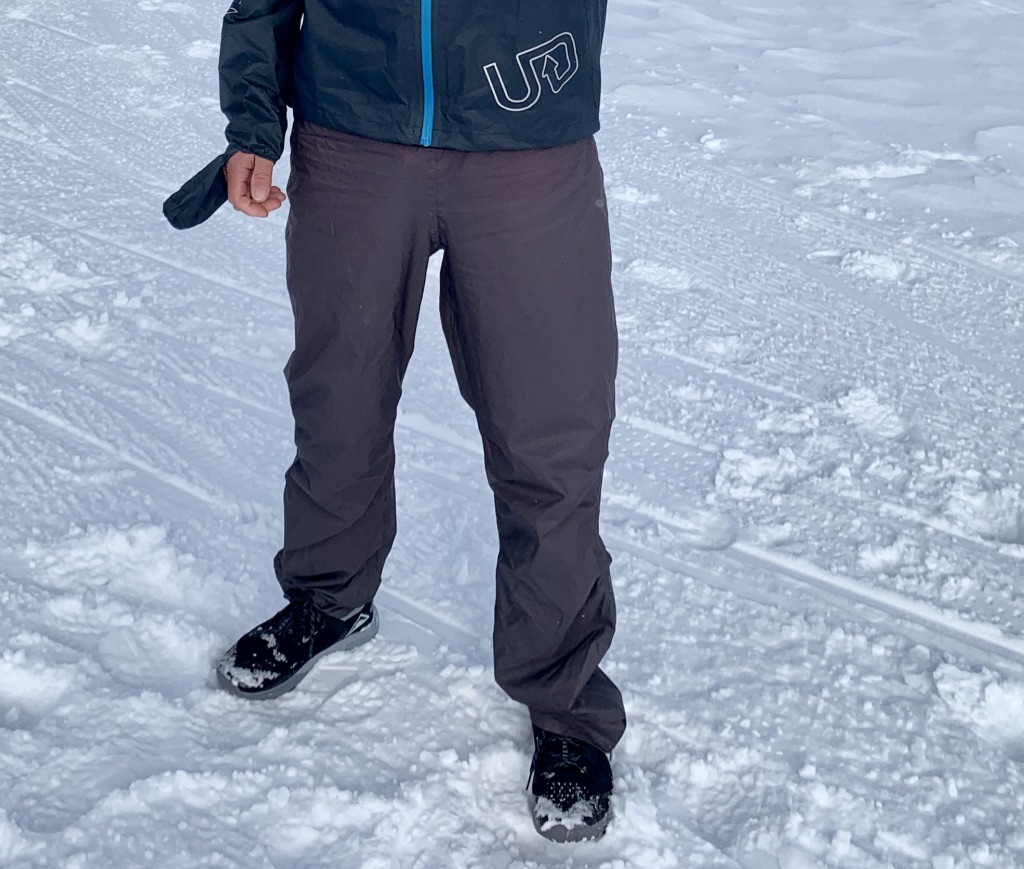
Mammut Runbold Hiking Pants
On the first day of our hike, I wore a pair of “dated” Mammut shorts that felt a bit long, so I switched to wearing hiking pants -- the Runbold. I wore them 12 days in a row with a few washes in between. Sam wore his most days as well. Here is another piece of clothing/equipment (along with a few others) that day after day provided both comfort and performance in all kinds of “May” weather. Incidentally, my Mammut shorts are also “Runbold” that I purchased five years ago in Switzerland (along with a pair for Sam). Mammut gave a “new look” to its classic Runbold model; definitely a favorite in our household.

 The fit is sleek and stylish with no extra material hindering your steps or rubbing against your skin. A Midori treatment of the fabric keeps you drier by absorbing sweat, wicking moisture away and drying faster. With 4 pockets, all with concealed zippers, I favored the leg pocket for storing my phone and used the side pockets at times to stow money, never using the seat pocket. As it happens, I would have made a better use of all the pockets if I did not have pockets elsewhere.
As we hiked in the snow over a two-day period, my Runbold pants kept me comfortable -- I did not have to layer up nor was I bothered by the wetness of the snow. Overall, they felt great even in warmer temperatures.
Color: 5 different colors, including black. I selected the color GALAXY, which happened to match the color of my Mammut backpack. It worked well with my peacoat Masao Light and white shell. Price: $ 129.00
Mammut Alessandria Tour Longsleeve Shirt ($85)

Mammut Alessandria Tour Longsleeve Shirt ($85)
Labeled a hiking shirt, I wore the Mammut Alessandria Tour longsleeve for après-hiking. Tailored for a tight fit, yet comfortable, it has a FreshTech antimicrobial treatment to prevent unpleasant odors. The shirt remained fresh and required no washing as I wore it every day for strolling around town and dining. I opted not to wear it when hiking as there is no stretch in the fabric and it was a bit heavy as a baselayer for our hike. The shirt has no pocket given its tight fit. In short, it was a great piece of clothing to bring along as I would “dress up” in my Mammut shirt fresh out of my pack and despite no wash. Both flattering and practical, it has become my go-to shirt since we have been back in New Hampshire as the weather has been on the chilly side.
Mammut Crashino Short Sleeve Shirt ($99)
 The super light and stylish Crashino shirt has a smooth stretchy feel, a top chest pocket and a side zip pocket. Incredibly breathable and quick drying it often went over my merino t-shirt or was my dress up shirt for dinner.
Mammut Crashino Short Sleeve Shirt ($99)

REI Co-Op Sahara Long-Sleeve Shirt -- Women’s

I wore the Sahara long-sleeve shirt on most days during our hike; the reason I opted to wear a t-shirt twice was to keep my shirt fresh as it required washing after a couple of days of hiking. I found the shirt extremely comfortable, performing, and flattering. Lightweight and made with a moisture-wicking nylon fabric, the shirt has core vents in the upper back that kept me cool and dry. Hiking all day long, I felt protected from damaging UV rays by wearing a long sleeve shirt with UPF 35 sun protection, as opposed to a t-shirt. In addition to my Sahara long sleeve shirt, I wore a REI Sahara sun hat, hiking pants, and paddling gloves, as well as sunglasses, exposing very little skin. The shirt has two front chest pockets, which I used to store my phone and reading glasses. A small loop attached to the flap of the left pocket allowed me to safely attach my sunglasses for super easy access. The sleeves roll up and can be secured in place with button tabs -- always a nice feature on a long sleeve shirt! Underarm panels treated with LAVA XL odor resistance proved less effective in keeping my shirt smelling fresh than other technical fabrics or wool on other garments that I wore during our trek. This is the most fitting hiking shirt that I have worn over the years and with a bit of stretch (5% spandex) creates a c. Fitting with some stretch (5% spandex), this is the most flattering and comfortable hiking shirt I have worn over the years. Overall, my Sahara hiking long sleeve shirt performed extremely well, however, is average in terms of being odor resistant.

REI supplied us their fantastic Sahara and Bucket Hats which were on our heads just about every day, and in all conditions. Light and airy they protected from the sun and even rain.
Ultimate Direction Ultra v2 jacket, pants, and Hydro Skin Shorts (RTR full UD Apparel review here)
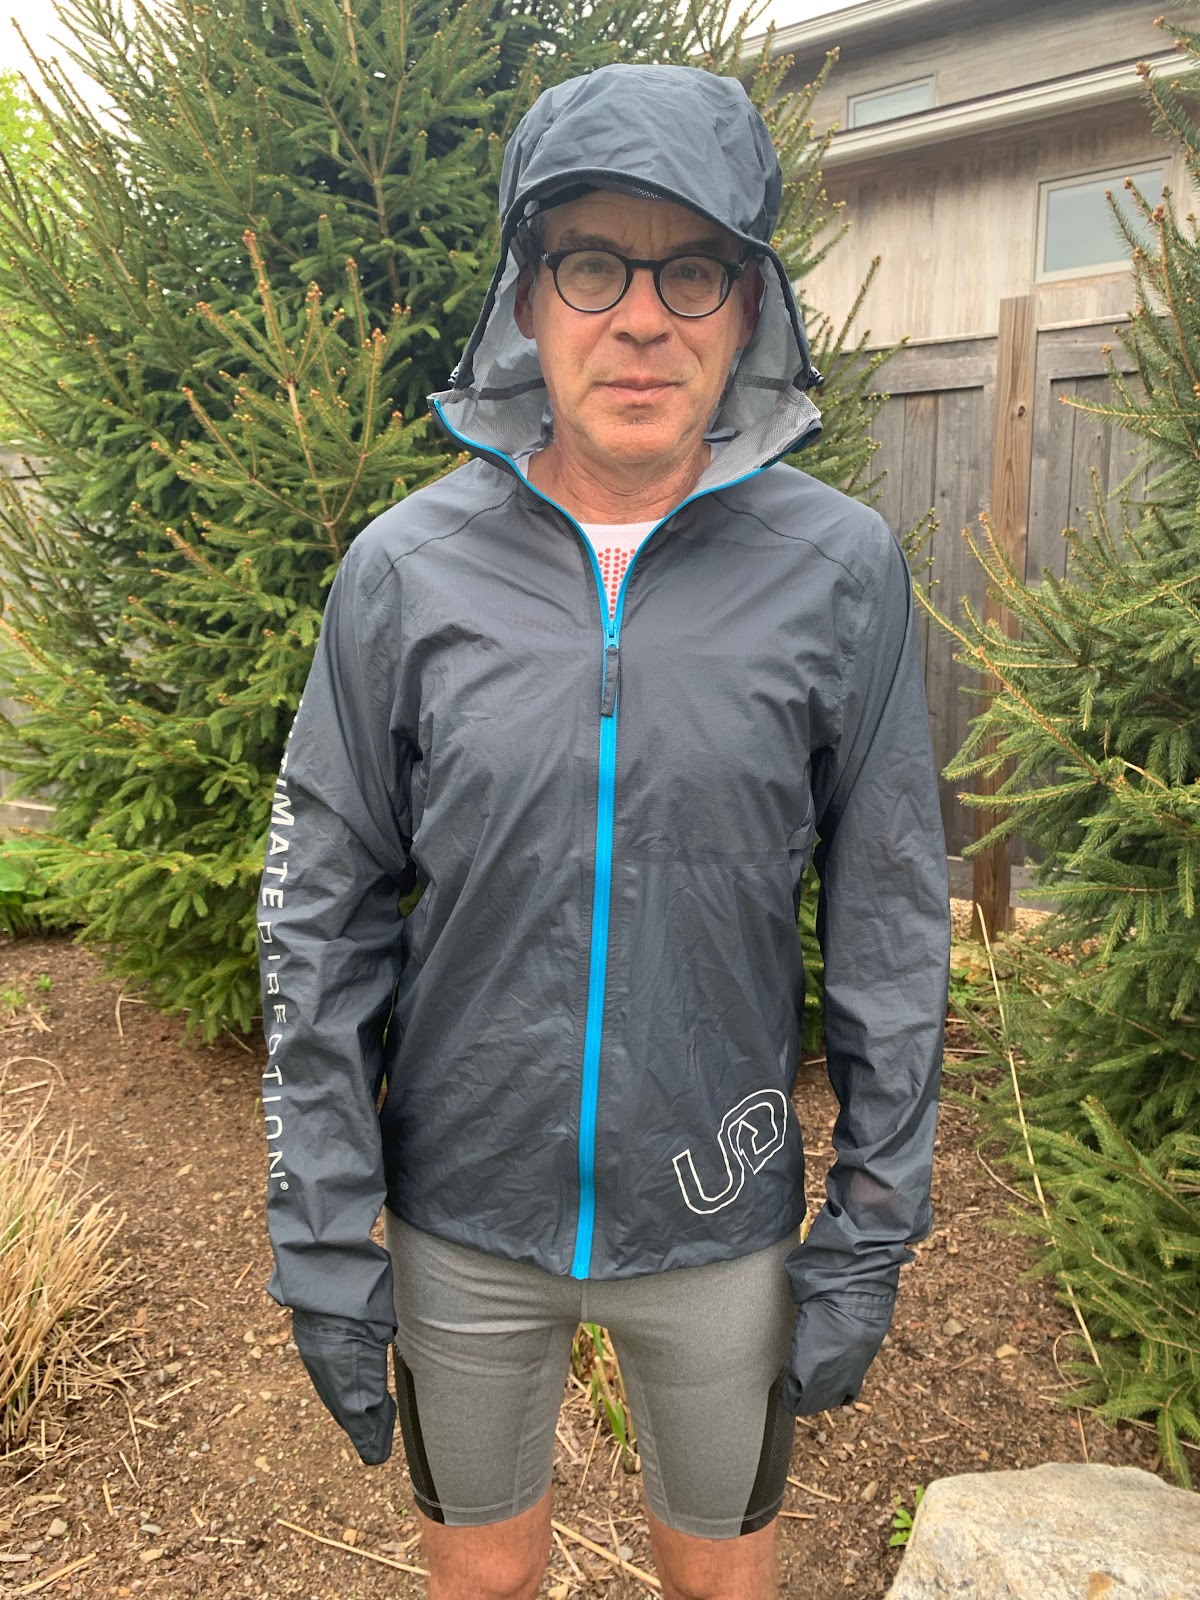
The jacket and pants have a yet better than the Masao waterproof breathable rating at 30K/30K. Combine the Ultra Jacket and Pant and you will have the lightest (at a total of 292 g / 10. 3 oz and most weather protective and breathable outfit by spec at 30K/30K we have seen to date.
While yet more breathable and waterproof than Masao, I missed the side pockets and pit zips of the Masao and its relative silence and softer fit.
There is an almost completely closed mitten which pulls out from the sleeves. I sure appreciated their slide out mittens. On a cold day, wet and below freezing, the mittens to stay warm and still have grip on my trekking poles. Ingenious and useful.

The Ultra v2 pants were outstanding.
A bit baggy and noisy their loose fit was super comfortable and even in freezing wet conditions I was more than fine over just running shorts. They are a key piece of gear to have in any pack for any run or hike where the weather is uncertain.
Ultimate Direction Hydro Skin Short.
The Hydro Skin Short is one of the most versatile pieces of kit I have used in many years. They have 2 any phone fitting thigh pockets as well as 2 hip pockets (for 2 flasks included) and a rear pocket which I use running but didn’t use during the trek.

Load carrying shorts, light compression shorts, or short tight I have worn them as is with no underwear with no chafing issues and as a base layer under the Ultra Pant, or underother pants during the trek. Given their comfort, carrying capacity, and included bottles they are a very good value given their performance and versatility and are highly recommended.
Dominique tested the REI Flash Folding Trekking Poles and refused to swap for my Black Diamond Distance Carbon FLZ Poles.

We always use trekking poles as they take some load of the legs and use the arms for a touch of propulsion, particularly on uphills.

Dominique's poles held up magnificently for the 13 days in Switzerland but back in New Hampshire on the 14th day of use the soft neoprene top pommel on one pole cracked.
200 miles in 13 days -- From Lake Constance (Bodensee) to Romont Fribourg

Day 1. From Rorschach by Lake Constance to Herisau via St-Gall: 16.4 miles +2600 feet

Day 2. From Herisau to Wattwil. Hiking through the edges of the canton of Appenzell.

Day 3. From Wattwil to Rapperswil-Jona on the upper end of Lake Zurich.
Day 4. Rapperswil to Einsiedeln - The black Madonna.

Day 5. Einsiedeln to Schwyz: The high point of the trek at about 1400 meters and snow day!

Day 6. Schwyz to Stans

Day 7. Stans to Fluëli-Ranft

Day 8. Fluëli-Ranft to Brüningpass

Day 9. Brüningpass to Interlaken

Day 10. Interlaken to Spiez: 8.63 miles +1335 feet

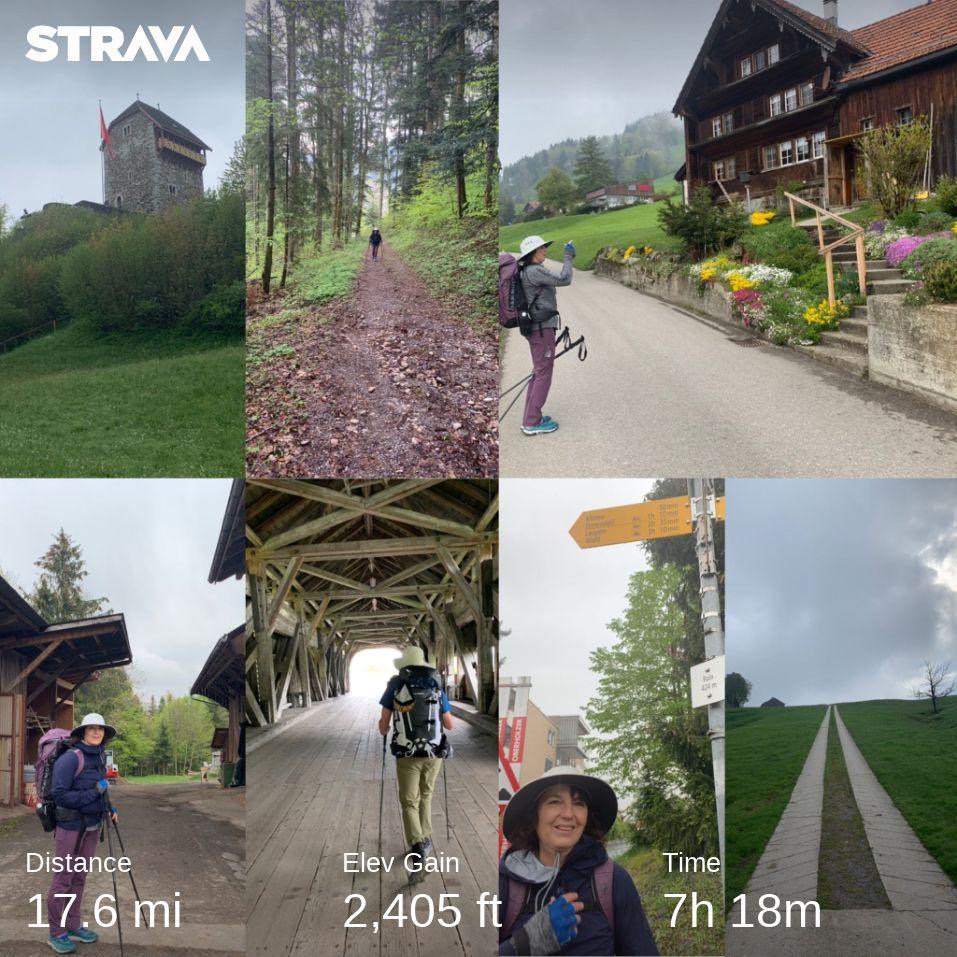
Day 11. Spiez to Riggisberg 18.95 miles, +2617 feet

Day 12. Riggisberg to Fribourg

Day 13 Fribourg to Romont: 17.12 miles, +2186 feet

Navigation and Mapping
We used the Switzerland Mobility app, which is free (optional off-line version with the ability to make custom routes is available for 35 CHF) It features the outstanding topo maps, down to a scale of 1:10.000 with literally every tree and building down to its shape shown, with over 32,000 km (19,883 miles) of signposted non-motorized routes and 60,000 km (37,282 miles) of signposted hiking trails. The app has a positioning system and compass function, which we used a few times to correct our course; as depicted in the picture below. The app told us exactly which one of the four roads intersecting to take in order to get back on the red dotted green route..

We also relied on the Via Jacobi, La Suisse à Pied, by Sabine Bolliger, edition Rossolis (2015), to plan our daily stages and for general background information. (Only available in German and in French.) As charted in the book, some of the stages were longer than others, and we tweaked our itinerary at the end of our trek by hiking close to three stages in two days in order to finish in Romont.
Sam wore both a Polar Vantage V GPS watch and a Coros Apex. The Apex clocked the daily routes from uploaded GPX files from Switzerland Mobility to the meter.
Weather
We had all kinds of weather but mostly it was great hiking weather with temperatures somewhat unseasonably cool and damp, in the mid 40’s or so most days.

We did have a "snow day" which was great fun.
Accomodations
At the entrance of villages or along the way, signs would indicate rooms for rent. Some of the room accommodation in certain regions were not are available until later in May.

Given the religious focus of this route on the way to Spain there are a number of convents and monasteries offering pilgrims and other travelers accommodations at reasonable prices, approximately . We stayed in a combination of youth hostels (2x), a backpacker hotel, and hotels, most 3 stars out of 5 on the Swiss scale. Generally prices were similar regardless of accommodations..

Most places we stayed were comfortable, some quieter than others, with either a private or shared bathroom. Often included in the price of the room, we had a buffet style breakfast that kept us fueled for our long day hike.
We used a combination of Google Maps, the Switzerland Mobility app ( to find the location of our hotel) and Booking.com to reserve hotel rooms. We generally booked our hotel room a day ahead and had no issues (being early in the season), except in Wattwil where the army had reserved all the hotel rooms and in Wattenwil where the few accommodations available were already booked. We met only one long distance hiker, who had started in Berlin, and was going all the way to Spain (4 countries and about 2000 km more when we met him). Later in the season and throughout the summer, it would be likely be a different story. We like taking these hikes before the summer crush when temperatures are cooler and crowds lighter.
We did not take up the offer to sleep on the straw at this farm -- aventure sur la paille/schlaf im stroh.

For dinner, we generally strolled through town to find a place to eat or ate at the hotel/youth hostel we stayed in.
 In In Einsiedeln, we visited the Schefer bakery/restaurant twice; once for a slice of Zuger Kirschtorte cake and later for dinner where our burgers, made with local beef, were layered with green asparagus!

For lunch the best and most economical way to go is to stop at a grocery store.

We often bought a roll, chocolate bar and drink for far less than a meal or drink at a cafe. Do be aware that smaller grocery stores tend to close between noon and about 3 PM though.
One of the neat features of the trail and even though we were very early in the season are small self service snacks and souvenir stands with products most often created at the adjacent farm houses.

After a hard climb in deep snow to the Haggenegg pass, we treated ourselves to rosti for lunch, which is a typical Swiss meal, at the Berghaus restaurant/hotel. The hotel in the right corner of the picture above.
Below what we found inside this cute trail side kiosk

This was by far the most elaborate and welcoming farm snack bar we encountered on the route/trail. Complete with coffee, sodas, snacks, a guest book, and a stamp for our pilgrim credential passport, we enjoyed a restful break at the farm.

We even saw a self service fondue and raclette automat in the vicinity of Wattenwil!

Budget
In terms of planning a budget, traveling the way we did, one must include about $150 per night with breakfast for two at a medium level 3 star hotel, about $30 for drinks and snacks along the way during the day, and about $60-80 for two per dinner with a beer or wine or two.
Most of the products reviewed were provided at no cost. Exceptions were the UD Ultra Jacket and Pants and Black Diamond Z PolesThe opinions herein are the authors'.
Comments and Questions Welcome Below!
RoadTrailRun receives a commission on purchases at the stores below.
Your purchases help support RoadTrailRun. Thanks!
SHOP REI FOR MOST OF THE GEAR USED ON OUR TREK HERE
Please Like and Follow RoadTrailRun
No comments:
Post a Comment